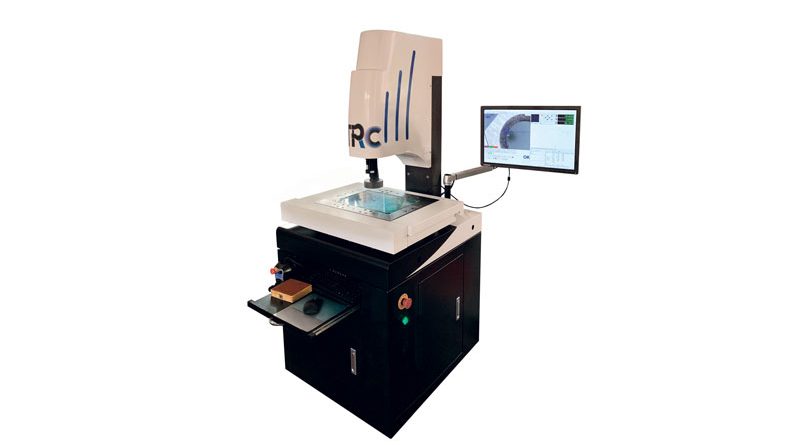
4.0 Measurement and Vision Machines
Sermac is an Italian company which has been specializing in several fields, including that of metrology, for over twenty years; under its trade mark TRC, it offers a wide choice of 2D/3D measurement and vision machines
by Claudio Tacchella
Nowadays, all market sectors are more and more interconnected – and the competition among global players keeps getting tougher; the real challenge for every manufacturer is to offer products of great quality, yet cost-effective enough to be profitable. Hence the necessity to integrate into the production chain every possible technical and commercial tool to assure reliability and process quality.
The dynamic demands of customers require optical vision and measurement machines constantly updated to comply with Industry 4.0.
Metrologic instruments are required in many fields
That’s why Sermac – a company based in the city of Muggiò in the Italian industrial district of Monza Brianza, with more than twenty years of know-how and practical experience in the field of metrology – can present itself as a first-class partner in 2D/3D vision and measurement systems.
“The greater accuracy, reliability and repeatability of these metrological instruments, together with their easy and user-friendly operation – says Alberto Gillio Tos, CEO of Sermac – have led to a constantly increasing demand for them on the part of our customers.”
Indeed, we can see a large and almost unprecedented diffusion of these systems in the fields of industry, trade and services.
Nicolas Ricci, Managing Director of Sermac, points out: “Our partnership with a famous Asian manufacturer, leading provider of metrology solutions for over fifty years, has allowed us to develop a complete line of vision and measurement machines under our brand name TRC. All of them are equipped with the technical and quality features dictated by our long-standing experience on the market”.
High-resolution inspection on an external monitor without eyepieces
The new autofocus videomicroscopes TRCVMAF and TRCVMAFPRO are the ideal instruments for the high-resolution inspection of many types of serial production parts, on an external monitor and without eyepieces. The lack of eyepieces is an important feature that helps prevent problems associated with eye strain and poor posture, which could in turn lead to health problems, stress and low efficiency in the operator. The control on a wide screen instead of traditional eyepieces ensures an unrivaled level of ergonomics and comfort.
“This new feature – points out Nicolas Ricci – brings a new perspective to the world of optical vision – and the inspection of complex parts, even with several different heights, becomes easy, rapid and repeatable.”
The videomicroscope has a HDMI connection port and can integrate many different types of color monitors, all in full HD. The rigid “all-in one” structure has been designed for maximum stability, and is ready to use without the need of a computer connection.
Telecentric optics for sharp images
The device comes with high quality telecentric optics with optic resolutions from <8,77 µm through <3,94 µm, which allow sharp and distortionless images across the entire field of view (FOV) – from min. 18,3×15,9×8,95 mm to max. 2,84×2,47×1,39 mm. The focal distance of 88 +/- 2 mm allows to visualize parts up to 50 mm height. The lens magnification is 0,7 – 4,5X. The fast reactive autofocus, which can be further speeded up through a fine height adjustment knob, and the three available lights (episcopic, diascopic and coaxial) ensure the best possible rendering of all details – thereby minimising cycle times. The integrated HDR (High Dynamic Range) functions, the high-resolution CMOS Color sensor, the high-quality optics for monitor magnification (1 – 6X) min. 29,92-179,5X – max. 192,34-1.154X, all allow easy, accurate and fast inspections.
These devices have been specially designed for electronics, mobile phones, automotive, watchmaking and fine mechanics. The new line of videomicroscopes TRCVMAF and TRCVMAFPRO includes several additional accessories to ensure the customization of the product.
An easy and operator-friendly software
The software has been specially designed to have a simple, intuitive graphic interface. All parameters are easy to set for an optimal optical inspection. Basic parameters include brightness, balance, contrast, sharpness and image saving. Additional functions include focusing, B&W or color, grit display, etc.
Apart from the basic settings, all other functions can be accessed just by clicking.
Nine models for 2D/3D vision and measurement
All models of 2D/3D TRC machines are built to the highest quality standards and can be adapted to specific applications. The range of nine models shows different technical features – like various X/Y/Z strokes, manual or CNC axis controls and many mechanical/software combinations. There is no limit to the number of measurable geometries. The TRC machines make full use of the potential of high-resolution, contactless measuring (FOV) – to ensure the best results with both small and large part sizes, up to 30 kg, all in a few steps. 3D measuring is performed through a special Renishaw probe mounted on the stand. Should it prove too difficult to carry out the measurements through the vision system or 3D probe, it’s also possible to install a laser measuring device.
Several software functions for single and/or combined measurements
The machines are equipped with an intuitive software for single or combined measurements. The points taking and geometric elements building functions are fast and easy to use, and so is the feature for the free creation of measuring programs.
Among the most relevant functions we can mention: the scanning and mapping of parts with the possibility of post-measurements; the rapid focal height measurement by video camera, the automatic running of programs (with parts both in the same position and displaced), the saving of programs (even with different magnification and lighting), the memorization of the rapid sequence for serial checking, the exporting of reports with graphics and images in all the most used, standard Office and CAD formats.
Sermac views its ability to be a qualified technological partner for an efficient pre- and post- sale support as one of its greatest strengths.
The offer includes product training courses, updates on all the latest innovations and trends in the metrology sector, as well as feasibility studies and technical tests carried out in its lab.

